Do you want to change the video source on your laptop to display the content on bigger screens such as TV or projector? Luckily, you can do this in a few simple steps.
If you want to change the video source on your laptop to a TV, connect the laptop to your TV via an HDMI cable and right-click “Volume“. Go to “Sound” > “Playback” > “Digital Output Device or HDMI“. Then, click “Set Default” and click “OK“.
To change the video source to a projector, connect it through an HDMI or VGA cable, and your laptop will detect it automatically.
To help you out, we compiled a detailed step-by-step guide on how to change the video source on your laptop to make the whole process quick and straightforward for you.
Changing the Video Source on a Laptop
If you are wondering how to change the video source on a laptop, our 2 step-by-step methods will guide you to complete this task without wasting time.
Method #1: Changing Video Source to HD TV
If you want to change the video source to your TV, connect it with your laptop in the following way.
Step #1: Connecting Laptop to TV
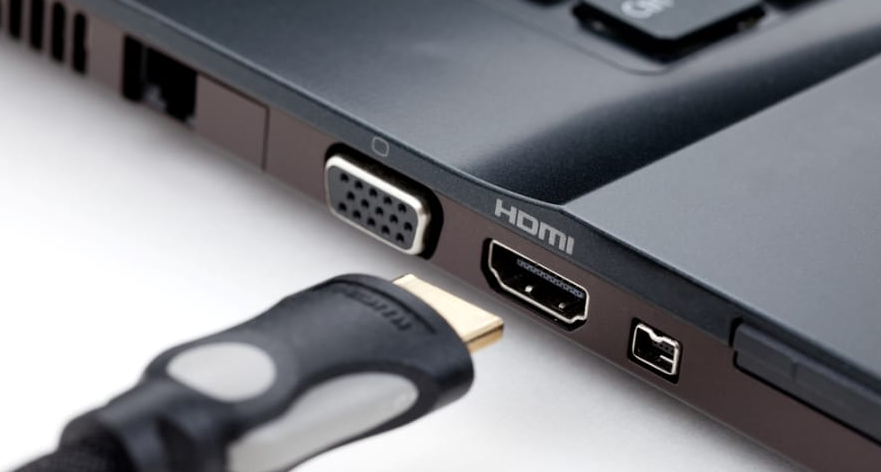
In the first step, turn off your TV or LED screen. Connect one side of an HDMI cable to your TV’s HDMI port. Connect the other side of the HDMI cable to your laptop’s HDMI port.
Step #2: Setting Up the Playback Option
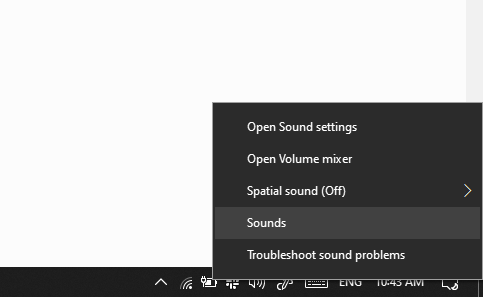
Right-click on the volume icon in the Window Taskbar. Select “Sound” from the menu and click the “Playback” tab. Choose the “Digital Output Device or HDMI” option. Click “Set Default” and click “OK“.
Step #3: Detecting TV As a Video Source
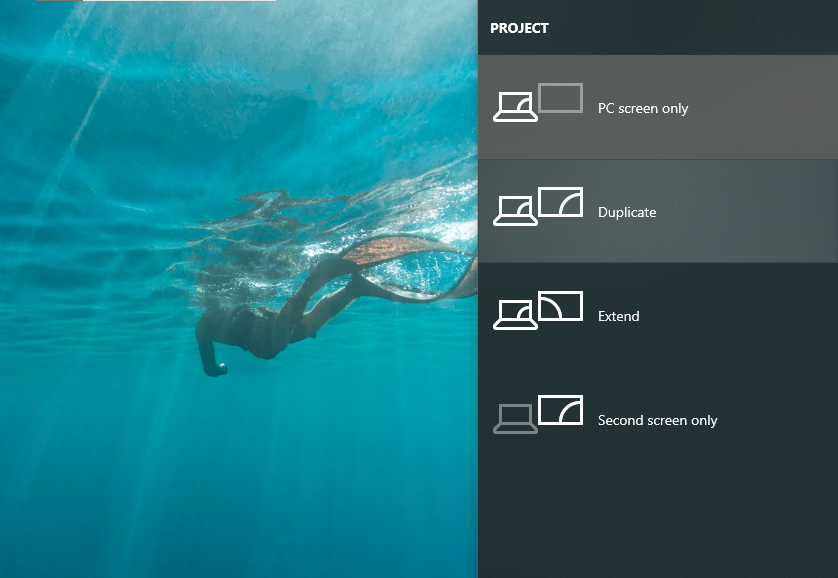
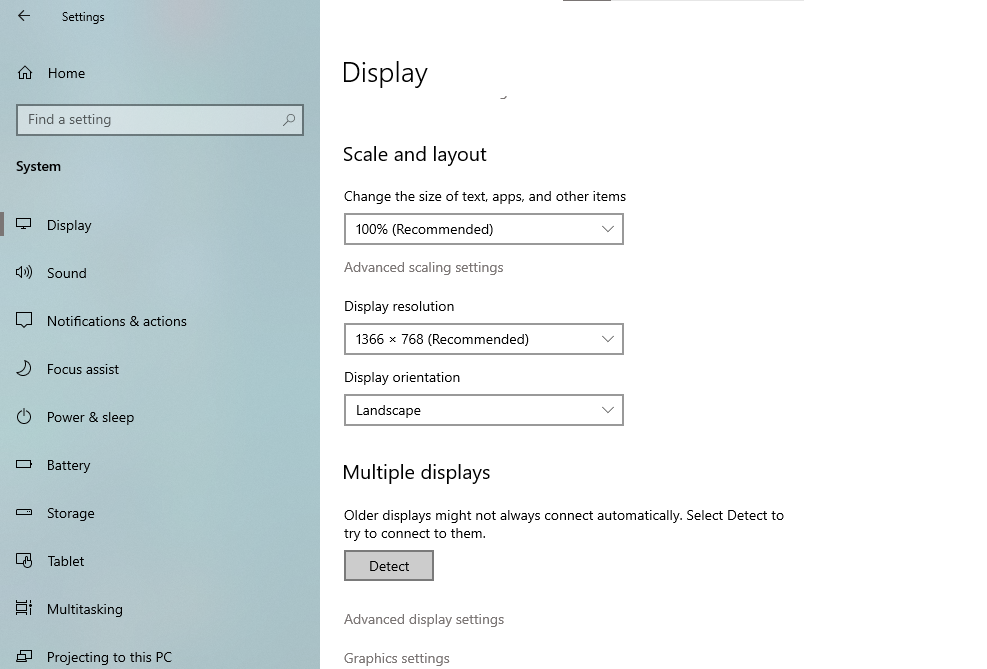
Right-click on your laptop desktop and click the “Display Settings” option. Scroll down and see if the TV is selected as the second monitor. If not, press the Windows + P keys and choose “Duplicate“.
You might also need to change the input source on your TV to HDMI. To do this, press the “Input” button on your TV’s remote and select the “HDMI” option.
Method #2: Changing the Video Source to Projector
You can change the video source on your laptop to a projector for a bigger and better display. To do this, perform the following steps in a sequence.
Step #1: Connecting the Laptop to the Projector
Plug the projector into the central power supply unit, but do not turn it on. Connect one end of a VGA cable to the output port on your laptop. Connect the other end of the cable to the input port of your projector.
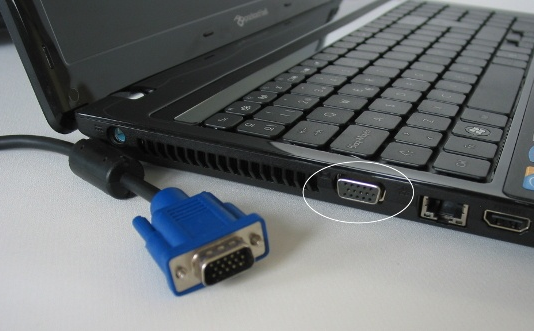
You can also use an HDMI cable instead of a VGA cable for better video resolution.
Step #2: Detecting Projector As a Video Source
Press the power button on your projector and let its lamp warm up for 30 seconds. Your laptop will automatically detect the projector.
If not, right-click on your laptop’s desktop and select “Display Settings“. Click the “Detect” option under the “Multiple Displays” header. If the projector is not selected as the second screen, press the Windows + P keys and choose the “Duplicate” option.
Primarily, the projectors detect the input source automatically. However, sometimes you have to set it under the “Input“ option using the projector’s remote.
What Are the Different Types of HDMI Ports?
Different HDMI ports come with laptops to change the video source. Each one of these ports requires specific HDMI cords.
- HDMI Type A is the most common port and cord used in most technologies.
- HDMI Type B offers a higher resolution and has 29 pins.
- HDMI Type C/Mini HDMI is designed for cameras and tablets and has 19 pins.
- HDMI Type D/Macro HDMI is designed for smartphones and comes with 19 pins.
If your laptop is not connecting with any output source, check the HDMI cable for any damage and replace it.
Summary
In this article on how to change the video source on a laptop, we’ve discussed two methods to help you connect your laptop to a TV or projector. We’ve also discussed different HDMI ports that come with various laptop models.
Hopefully, with the information provided, you can change the video source on your laptop without difficulties.
Frequently Asked Questions
Head to the “Device Manager” in the Control Panel and click “Display Adapters“. Right-click on the “Intel (R) HD Graphics” option or any other you find under the “Display Adapters” header. Choose “Update” and click “Search automatically for updated drivers software“.
Yes, you can use your laptop to display your PS5 by using a video capture card to connect the console directly, or you can use Sony’s Free Remote Play app on both Windows and Mac laptops.
