Do you need to display your laptop screen on a projector but don’t know about connecting the two devices? Luckily, there are easy ways to do so without much effort.
To connect your laptop to a projector, use a compatible cable (HDMI, VGA, or DVA) to build a connection between the two. Turn on your laptop and projector. Once they are on, press the Windows + P keys on your laptop simultaneously and select your preferred screen-sharing option for the projector from the list.
We have created an extensive guide with easy step-by-step methods that you can use to connect your laptop to a projector.
Connecting a Laptop to a Projector
If you don’t know how to connect your laptop to a projector, follow our three easy-to-follow methods that require minimal effort.
Method #1: Using a Cable
Follow the steps to connect your Windows laptop to a projector via a cable.
- Connect your laptop to the projector via a compatible cable (HDMI, VGA, or DVA).
- Turn on your laptop and projector.
- Once both devices are on, press the Windows + P keys on your laptop simultaneously.
- Select your preferred screen-sharing option for the projector from the list.
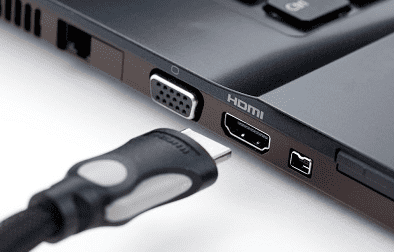
Most laptops and projectors have HDMI or VGA ports; however, your computer might need an adapter to connect the two devices.
Method #2: Using Bluetooth Connectivity
If your projector supports the Bluetooth feature, you can connect your Windows laptop to it in the following way.
- Turn on your laptop and projector.
- Put your projector in pairing mode by pressing the button on the projector or its remote.
- Turn on the Bluetooth on your laptop and pair the projector.
- Once connected, press the Windows + P keys on your laptop.
- Select your preferred screen-sharing option for the projector from the list.
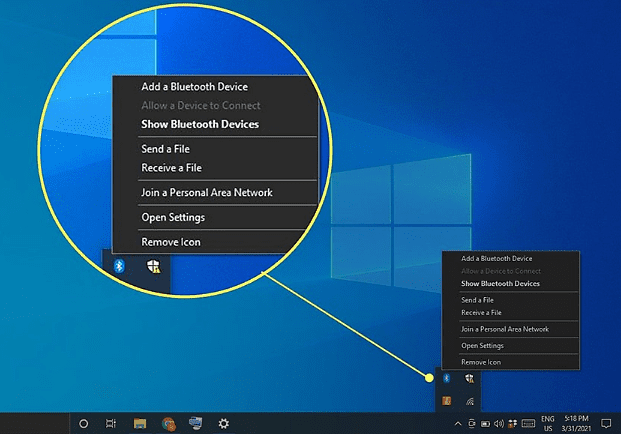
Your projector may have different pairing settings based on its model and brand. Refer to its user manual for more instructions if needed.
Method #3: Connecting a Laptop to a Projector on Mac
Do the following steps if you need to connect your Mac to a projector via cable.
- Connect your Mac to the projector via a compatible cable or an adapter.
- Turn on your Mac and projector.
- On your Mac, navigate to System Preferences from the Apple Menu.
- Click “Display” and go to the “Arrangement” tab.
- Drag the displays to arrange them or click “Mirror Display”.
- Your selected display will be shown as the projector display.
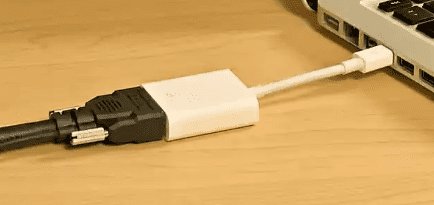
Your Mac can also automatically detect your projector, but you will still need to follow the above method if you want to change the display settings. Newer models of Mac don’t have an HDMI port, so you will need an adapter to connect it to your projector.
Customizing Your Projector Display
Have you set up the projector with your laptop but are having problems with the display? You can easily customize display settings on your laptop to give you the best possible result with the following steps.
- Click Start and go to Settings.
- Click “System” > “Display”.
- Select the display of your projector.
- Scroll down to “Scale and layout”.
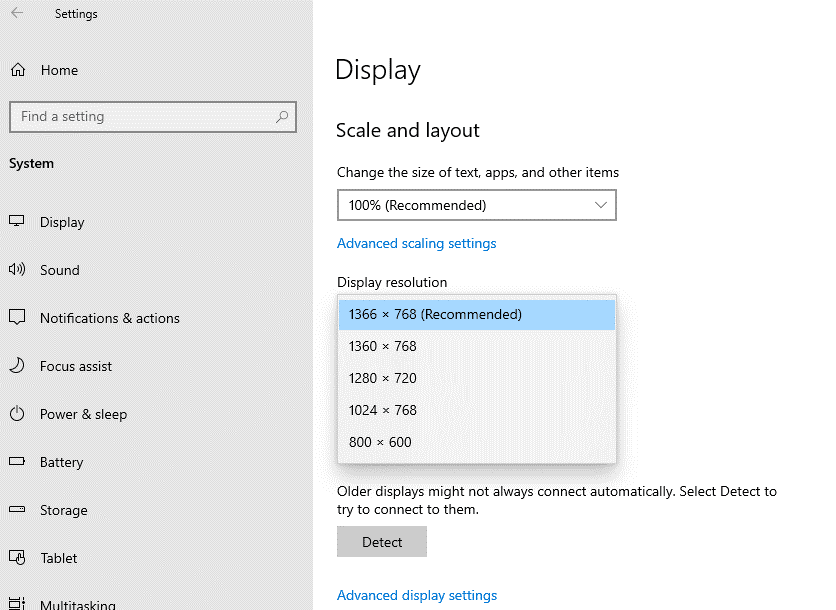
- Adjust “Display resolution” until the projected image is as per your desire.
Is Your Laptop Not Connecting to a Projector?
Is your projector showing “No Signal” even after you’ve connected it to your laptop properly? A variety of factors may be the cause.
Reason #1: Faulty Cable Connection
If you’ve connected your laptop to a projector via cable, the cable may be the source of the issue. Ensure that the cable is connected securely on both ends and that the thumbscrews on VGA or DVI cables are firmly connected.
Check the video cable for wear or fraying if the connections on both ends appear secure. Replace the cable and try again if you notice any worn spots.
Reason #2: Adapters Not Functioning
If you’ve connected your laptop to a projector with the cables through an adapter, ensure it is working properly. Connect your projector to your TV or other display devices through an adapter to rule out this possibility. If the issue persists, change the adapter and see if this fixes your problem.
When connecting Apple devices to projectors, make sure that you use an authentic AV Adapter.
Reason #3: Window Display Preferences
If you’re using an older version of a projector, then you might need to reduce the resolution on your laptop or computer. To change the display resolution to a lower level, open Settings > “System” > “Display” > “Scale and layout”. Select a lower resolution.
You can switch back to the default settings for the monitor after connecting the projector, leaving the lesser resolution enabled solely for the projector.
Summary
This guide discussed different methods to connect a laptop to a projector. We also discussed how to customize the projector display and troubleshoot the laptop if it is not connecting to the projector.
Hopefully, with one of these methods, you can enjoy the contents of your laptop screen on your projector without any issues.
