We often capture many images on our smartphones: this can eventually lead to the Gallery of your Android device being disorganized and clogged up, making it challenging to look for photos. That is why you might want to organize the images in your Gallery to make life easier. This begs the question, how do you organize photos in your Android Gallery?
Using any of these methods, you can organize photos on your Android device.
• Create new albums in your Gallery.
• Sort images according to date.
• Use Google Photos.
• Install third-party sorting applications.
In this article, we will go over the different methods you can use to organize the photos on the Gallery of your Android device.
Method #1: Organizing Photos by Creating a New Album
Creating a new album in the Gallery of your Android device is the simplest and easiest way to organize photos. This is because you can then bifurcate your photos according to your needs. In essence, it follows the same premise as creating a folder.
Here’s how you can create a new album in your Gallery.
- Open the Gallery app.
- Press the three-button icon visible on the right side of your screen.

- Select the “Create album” option; name your album and press “Create”.
- Select the photos you want to move to the newly created album.
- Press the three-button icon in the top right corner.
- Select the option “Move to album”; choose the newly created album.
Method #2: Sorting Images According to Date
The Gallery application on your Android allows you to organize photos according to the date they were captured or received on your device. However, only images saved in an album can be sorted according to their date.
Here’s how you can use this method.
- Open the Gallery app.
- Select an album you want to sort/organize.
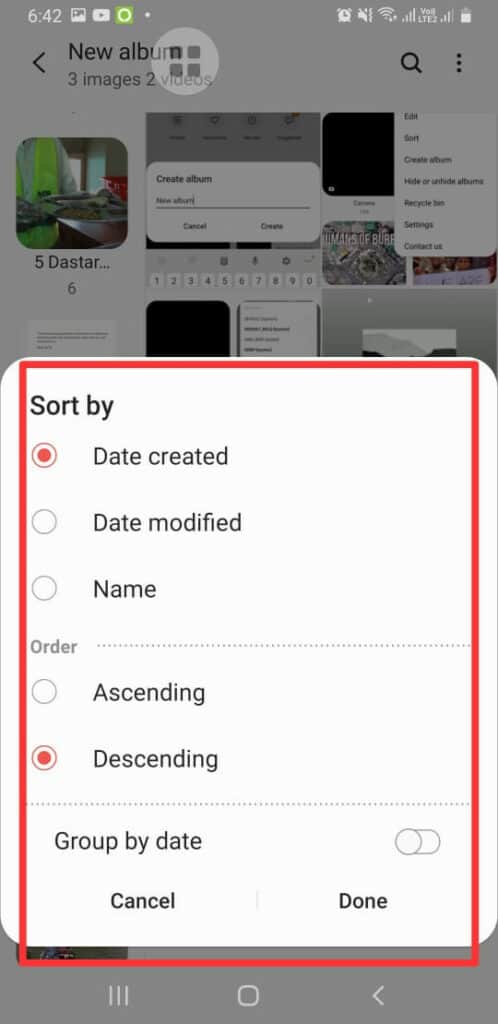
- Locate and select the “Sort” option.
- This will open a prompt allowing you to sort by “Date created” or “Date modified”; select one of the options.
- Press “Done” to save these changes.

If you want to change the order in which your photos are organized, follow the steps we’ve highlighted above. But, before pressing “Done”, select the order too.
Method #3: Using Google Photos To Organize Images
Using Google Photos to organize photos on your Android device makes this difficult-looking task extremely easy. Google Photos automatically saves, backs up, and organizes photos saved on your Android device based on their background or facial recognition.
You can use several methods to organize photos with the Google Photos Application.
Creating a New Album on Google Photos
Follow these steps to sort your photos by creating a new album on Google Photos.
- Open the Google Photos application on your Android device.
- Direct yourself to “Library”, the option visible in the bottom right corner.
- Press the option which allows you to create a new album.
- Give your new album a title.
- A prompt will appear, allowing you to select photos you want to add to the album.
- To add the selected photos, press the “Add” option in the top right corner of your screen.
Organizing Photos by Face Recognition
Google Photos has a feature that allows you to organize photos based on facial recognition. This means that you can sort your images according to the individual or character visible in the photo. However, to use this method of sorting images, you must give a name to the person in the photograph.
The following steps will guide you on how you can organize images on Google Photos using this method.
- Go to the “Search” option on Google Photos. This will lead you to a section labeled “People & Pets”.
- There will be an option to add names to different people/characters recognized in your photos (“Add Name”).
- Give the character a name and save any changes; this will organize all the photos of that person or character decluttering your Gallery.
If you keep the location of your Android device turned on, Google Photos will also organize your images based on the area they were captured in. Head to the “Search” section to access these images and locate places. This will prompt up different photos your Android device received or captured at different locations.
Method #4: Using a Third-Party Application To Organize Images
There are many applications available on the Google Play Store that you can use to sort and organize images on your Android device. Applications you can use for this purpose include the following.
We will be using the Foto Gallery application to demonstrate how applications like these can be used to organize images on your Android device. The application makes use of tags which helps it associate pictures with each other.
In addition, it also provides you with a Gallery optimization feature that deletes any duplicate photos decluttering the Gallery of your Android device and helping save some storage space in the process, too.
Creating a New Album on Foto Gallery
To create a new album on this application, follow these steps.
- Open the application on your Android.
- A prompt will show up requesting access permission; press “Okay”.
- Press the “New Album” icon on the right.
- Name your album and save these changes.
- Select the photos you want to move to the new album.
- Press the three dots icon and select “Move”; choose the folder to which you want to transfer the images.
Organizing Photos on Your Android Through Foto Gallery
Foto Gallery allows you to select multiple photo albums on your Android with the option to organize them into albums of your preference. To do this, you should follow these steps.
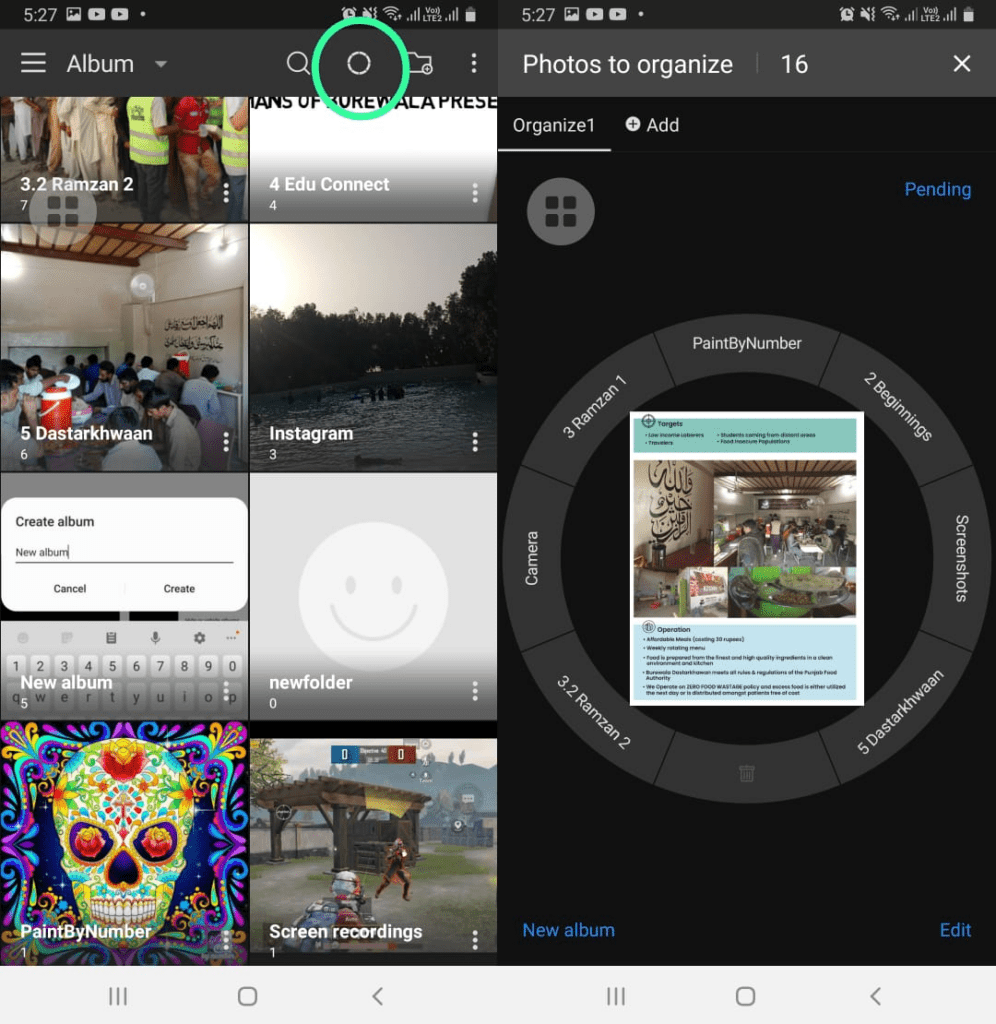
- Tap the “Organize” icon at the top and select the albums you want to organize.
- Press the “Organize” button at the top right corner.
- A circular wheel will appear, allowing you to organize images in the albums of your choice.

Conclusion
Having a cluttered Gallery can make searching for old photos a tormenting task. We recommend using Google Photos instead of the regular Gallery application. This is because Google’s own offering has a lot of features related to sorting and organization that take advantage of AI to sort and organize photos for you.


