Most computer enthusiasts want the Thunderbolt 3 port on their new laptops. However, if you have recently got a new system and aren’t sure if it has Thunderbolt 3, there are multiple workarounds to help you figure this out.
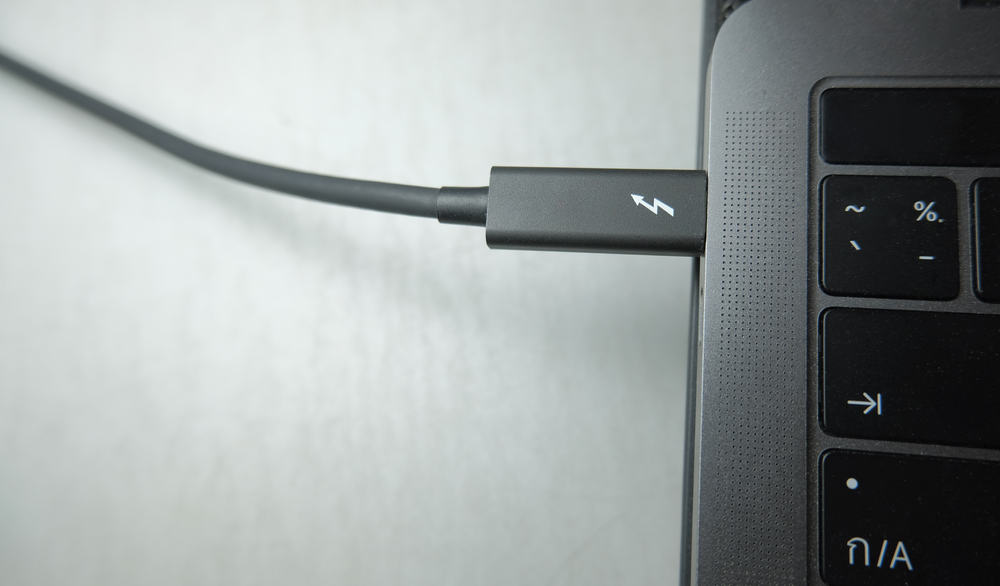
To check if your laptop has Thunderbolt 3 port, verify a lightning symbol next to or below the USB-C port. You can also check the laptop user manual to confirm it is Thunderbolt 3 port enabled.
We have put together a comprehensive guide for you to tell if your laptop has Thunderbolt 3 port. We will also discuss multiple fixes for you if your PC doesn’t recognize the Thunderbolt 3 devices.
Checking if Your Laptop Has Thunderbolt 3
If you’re wondering how to tell if your laptop has Thunderbolt 3, our 3 step-by-step methods will help you find it out without much difficulty.
Method #1: Checking the USB-C Port
The first thing you can do to tell if your laptop has Thunderbolt 3 is to check its USB-C ports. To do this, tilt your laptop and see the left and right sides of the keyboard panel.

If you find a lightning symbol printed next to or below the USB-C port, your laptop is Thunderbolt 3-compatible.
Method #2: Checking the User Manual
You can also verify if your laptop has thunderbolt 3 by checking its user manual or other attached documentation. If your system supports Thunderbolt 3, it will be the main feature listed in the manual.
You can also visit the manufacturer’s website and find your laptop on the product page. The website will specify this information if it has a Thunderbolt 3 port.
Method #3: Using the Thunderbolt Compatibility List
You can also find out if your laptop has Thunderbolt 3 by visiting the Thunderbolt compatibility list using these steps.
- Open a browser and go to the link containing Thunderbolt-compatible devices.
- Select “Windows” from the “Operating System” and “Thunderbolt 3” from the “Version” menu.
- Use the “Category” and “Company” menus to filter the results based on your laptop model.
- Click “Apply”, find your laptop from the search result and verify the Thunderbolt 3 port.

Fixing Thunderbolt 3 Device Not Recognized
If your laptop isn’t recognizing the Thunderbolt 3 device, try our 3 step-by-step methods to fix the problem.
Method #1: Rebooting the Laptop
If your laptop isn’t recognizing your Thunderbolt 3 device, you can do a quick reboot to fix the issue.
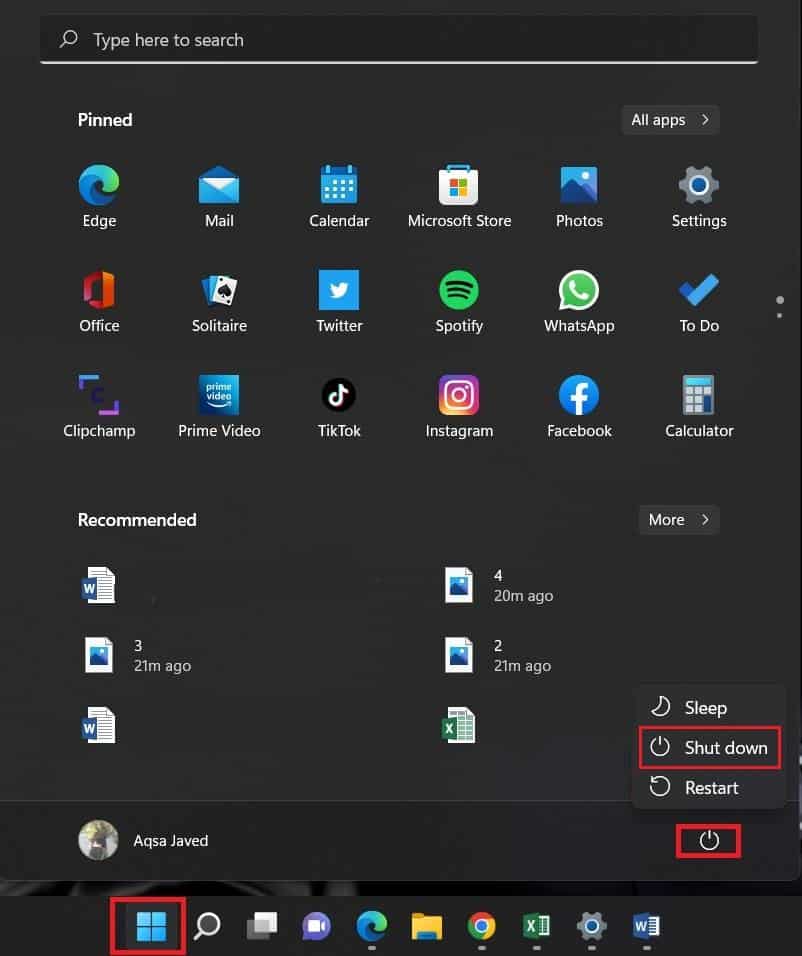
- Choose the Windows icon from the taskbar.
- Select the power icon from the pop-up window.
- Click “Shut down” and wait 1-2 minutes for your laptop to turn off.
- Connect your Thunderbolt 3 device to the computer, turn it on, and see if this fixes the issue.
Method #2: Updating the BIOS in HP Laptops
You can make your HP laptop recognize the Thunderbolt 3 device by performing a BIOS update with these steps.
Step #1: Gather the Necessary Information
Press Windows + R, type “msinfo32” in the Run dialog box, and choose “OK”. A System Information Window opens up. Ensure that you are in the “System Summary” tab.
Find “BIOS Version/Date” from the enlarged right pane and note it down. Note your laptop’s operating system, bitness (i.e., 32 or 64-bit), and system model.
Step #2: Visit the Support Page
Head to your laptop’s brand’s Software & Driver Downloads page (e.g., HP). Type in your system’s model name under the “Enter your serial number” section and press Enter. Choose the model name that matches yours from the search result, and the support page for your model will open.

Step #3: Check the BIOS Update
On the support page, click below the “Operating Systems” in the English section and choose the OS you noted earlier. If you see a “+” sign beside the BIOS category, select it; otherwise, go for the original version.
Step #4: Setup Extraction and BIOS Update
Check for the BIOS update availability. If you see an update, choose “Download”. Run the downloaded setup on your PC and click “Next”. Accept the “Eula agreement”. Choose “Next”, copy the extraction path and click “Next”.
Once the extraction is complete, hold Windows + E. Paste the copied path on the address bar in Windows explorer, press Enter, open the “hpqflash” folder, and run the file that looks like “SP73917_E”.
Choose “Update the system BIOS on this device” and press “OK”. Follow the on-screen instructions to complete the BIOS update installation process.

Your laptop will now successfully recognize your Thunderbolt 3 device.
Method #3: Updating the Thunderbolt 3 Firmware
It is possible to make your Dell laptop recognize the Thunderbolt 3 device by updating the Thunderbolt firmware.
- Plug your Thunderbolt 3 device into your laptop and go to the Dell Support page. If you don’t have a Dell laptop, visit your manufacturer’s website and download the Thunderbolt 3 firmware.
- Enter the service tag of your Dell device under the “Identify your product” option and choose “Search”.
- Go to “Drivers & Downloads” on the Product Support Page for your laptop and click “Manually find a specific driver for you”.
- Under the “Category” option, select “Chipset”.
- Find the Intel Thunderbolt 3 firmware on the list and click “Download”.
Once the download completes, locate and run the file on your PC, follow the on-screen instructions to perform the update, and check for the issue.

Summary
In this guide, we have discussed how to tell if your laptop has Thunderbolt 3. We’ve also looked into some fixes when your laptop won’t recognize the Thunderbolt 3 device.
We hope one of these methods has worked for you, and you can enjoy a hassle-free experience with the enabled Thunderbolt 3 port.


