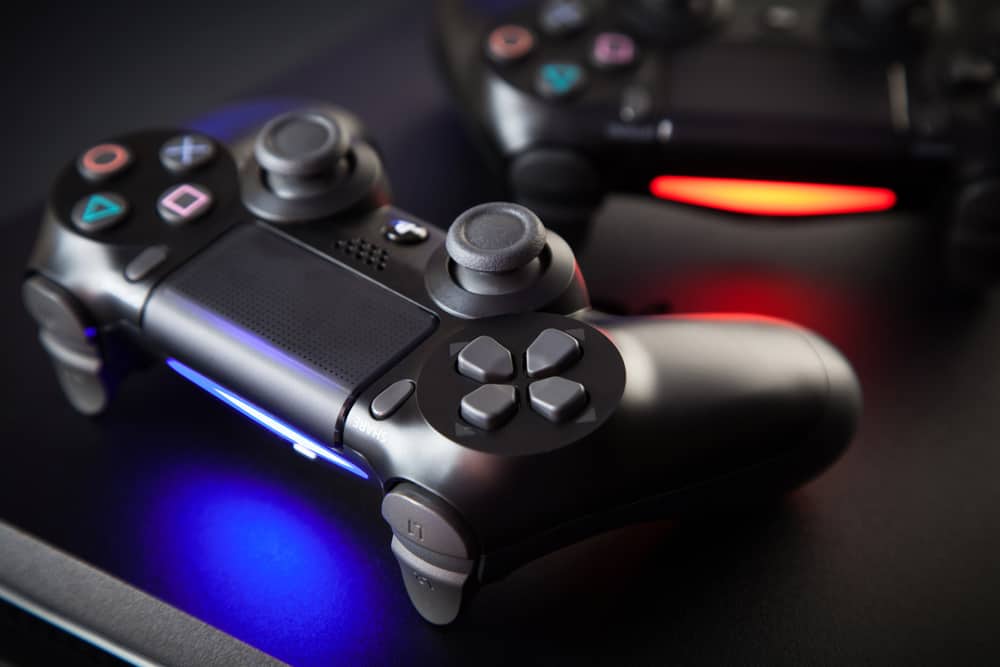
The DualShock 4 controller displays a wide variety of lights, all of which mean something. Some of those lights are only displayed as in-game indicators or to determine which player is who in a multiplayer game, which is really convenient when everyone is moving around, taking breaks, etc.
The orange light indicates that the controller is either in “rest mode” or there is a potential connection issue. If for some reason it won’t break out of that mode and the orange light consistently remains on, you have a problem.
To clarify, a solid orange light is the equivalent of “rest mode” while a softly, pulsing orange light indicates that the controller is charging only, not turned on, or otherwise engaged with anything other than charging.
The orange light is often difficult to differentiate between it and the yellow light. Fortunately, that shouldn’t matter much in terms of getting the issue fixed. Reaching a resolution means that you won’t have a yellow or orange light problem any longer.
Reset Your DualShock 4 Controller
One of the mainstays in modern technology is the reset. The soft reset that is, not the full-on factory data reset that reverts everything back to its original state, wiping out all of your saved data.
Soft resets work because little software quirks are often an issue in sophisticated systems and a soft reset will generally clean the problem up and put everything back in good working order.
- Locate the reset button behind the left, shoulder button
- Insert a pin/paper clip to depress the reset button
- Hold down the reset button for 5 seconds (minimum)
- Plug the controller into the PS4 via a USB charging cable
For the most general malfunction with your DualShock 4 controllers, this will solve the problem 99.9% of the time.
Reset the Playstation 4 Console
If resetting the controller doesn’t work, move on to the bigger product. As aforementioned, a soft reset will fix most of your simpler problems almost all of the time. When you reset the console, it’s the new age equivalent of pulling that Nintendo cartridge out and blowing air in the bottom.
Most guides will walk you through a full console reset, which will delete all of your data and start you back from the beginning as if you just pulled your brand new Sony Playstation 4 out of the box. That’s not what you’re going for here.
Press and hold both the power and the “eject disc” button down at the same time and keep holding them down for about 20 to 30 seconds. The PS4 will emit a beep or two and shut down completely.
It won’t turn back on its own, however, because all you need to do from here is press the power button to turn it back on like normal.
A soft reset will close all of the open applications running on your PS4 at that time, along with any other background processes. It will also clear all of your data caches, along with whatever you have going on in the RAM at the moment.
Start Your PS4 in Safe Mode
If your USB ports are not working properly, you will never be able to boot up your PS4 in Safe Mode. It was designed that way so it simply won’t work. Since USB ports are a known problem with the PS4, that may be a problem.
However, assuming yours work and all you need to fix is an irritating orange light on your controller, it should be fine.
- Shut down the PS4
- Press and hold the power button for more than 10 seconds
- Connect your PS4 controller via the USB cable
- Press the PS button on your controller
If everything works right, your DualShock 4 controller will light up blue (which indicates a connection attempt) before turning white (which indicates that it is connected to your PS4). If you get that, then you’re good to go.
Safe mode is designed to eliminate a lot of software problems that are going on either in your PS4 or issues in your DualShock 4 Controller.
USB Port and Batteries
These are two things that you really have to check over by eye, rather than by resetting or otherwise messing around with your console.
You can do this by disassembling the PS4 controller and visually confirming that the ribbon is lined up correctly and each time that you press the PS button, you are completing the circuit. If something is wrong with the ribbon, it will have to be replaced.
Fortunately, you can purchase another one off of Amazon. They aren’t too difficult to replace, however, it will call for complete disassembly of your controller so that the ribbon will easily slide into place.
Keep in mind, if you try to replace the ribbon, you will need the right tools, which means a tiny screwdriver with a small alligator clip to properly ground the tool and avoid a static shock to the components.
It also helps to wear rubber gloves. A static shock can do enough damage to the electrical components on the circuit board to cause it to fail permanently. The problem is, the shock can be so minute that you don’t even notice it.
You might wonder why bother being so safety conscious. It’s only a controller, not a $1,000 video card. That’s true. But, when you think about it, who wants to shell out $50 only to turn the device into a paperweight five minutes after you unbox it?
The only other thing you need to check is the USB port connection, preferably while you have the controller opened up and effectively dissected before you. Ensure that it is making contact and completing the circuit whenever it’s plugged in.
Final Thoughts
DualShock 4 controllers are one of the most, if not the most, popular controllers in the console gaming market. They didn’t get that way because they are a notoriously malfunctioning mess. They got that way because of how well they fit your hands, play, and remain consistently durable throughout their life. In other words, having problems with these controllers is a rare thing and usually, it’s pretty easy to fix.


