The Internet has become much more than a basic necessity in the current day and age. Therefore, the need to track its usage is more vital than ever. While it’s pretty possible through third-party applications, doing so through a Wi-Fi router is an entirely different behemoth to conquer.
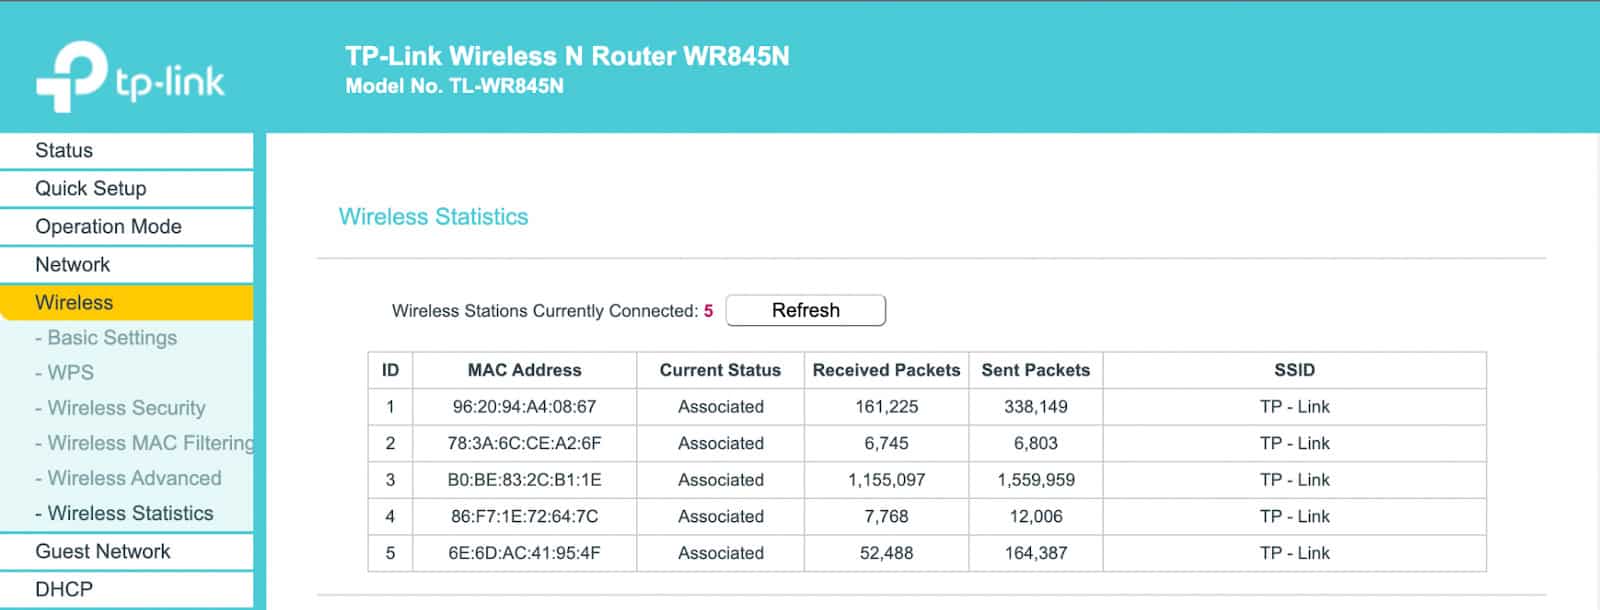
You can track the data usage on a Wi-Fi router through the “Wireless Statistics” tab present on the IP address page. Enter your router’s relevant connected IP in the field and navigate your way from there.
The location of the statistics tab might differ depending on your router and its manufacturer. Therefore, it’s better to follow a general approach instead.
This guide will show you how to check data usage on Wi-Fi routers and the subtle UI differences you might have to encounter during the process.
Accessing the Router’s Status Page
You can check your router’s status page as the primary hub of every modem-related setting, so accessing this page is necessary to edit the settings. While most modern routers possess a relevant mobile application for their operations, it’s pretty rare for ISPs to use them.
Here is how you can access your router’s status page.
Step #1: Identifying the IP Address
Each router has an IP address assigned to its status pages. It is the default IP address of your router, so make sure not to confuse it with the internet IP. While this information might be available on your ISP’s website, a more straightforward method can help identify the IP address.
You need to follow the steps mentioned below.
- Connect to your router through a LAN cable. You can also use a wireless connection as long as you know the requirements.
- Search for “Command Prompt” using the Start menu search bar.
- Ensure to select “Run as administrator“.

- Type
ipconfigin the text terminal and hit the Enter key. - Scroll down until you see a “Default Gateway” row and copy the IP address. For reference, it generally starts with 192.168 or a 10.

Step #2: Enter the Information in Browser
Copying the IP address of your modem/router won’t do anything unless you know how to make use of it. While this might seem too “techy”, the process is straightforward. Here is what you need to do next.
- Launch your default browser.
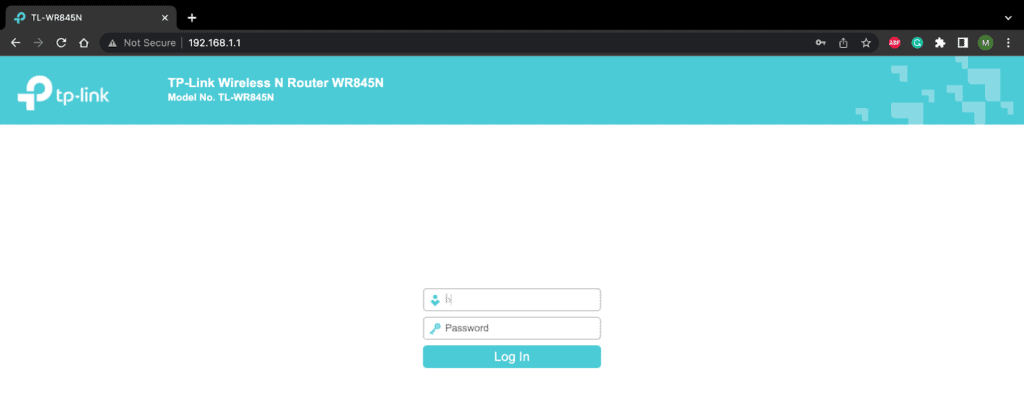
- Enter the copied IP address in the address bar. You don’t need an active internet connection to access this page.

Once the page’s contents have been loaded, you will be prompted to enter a unique username and password. You can find this data at the back of your router. If you can’t find it, you can contact your router provider or search for it online.
Make sure to change the default username and password as soon as possible to avoid getting hacked. Every device connected to the Wi-Fi can access that page. Therefore, it’s unsafe to have every credential at default due to their online availability.
Checking the Data Usage
Next, it’s about time we find the data usage metric. There are a few steps you need to follow to find it.
The status page for every router might differ. Here’s a general approach for this step.
- Head to the “Traffic Statistics” of your router page.

- Scroll down until you see information like “Bytes sent” or “Bytes received“.
- Do the math by dividing the bytes by the following to get the needed data.
| Unit | Divide By |
| Kb | 1024 |
| Mb | 1048576 |
| Gb | 1073741824 |
The number of received bytes will go up and down depending on your internet usage. Therefore, it won’t give you real-time data usage statistics.
Conclusion
A router’s status page is the primary hub of the settings and analytics of your router. We recommend keeping it as secure as possible. You can access it by entering the IP address of your router. You will find analytics like data usage and byte inflow and outflow on this page, so pay close attention to all the numbers.


